Manage Project data
Projects are the main containers of information.
While testing and analyzing target systems, the scope of information will grow accordingly. You can add testing results manually, or export testing results directly from such tools as Nmap, Masscan, Nessus, Metasploit, Cobalt Strike, and others. Everyone in your team will see the latest updates as soon as they appear.
When you complete your research, you can transfer all collected data to end customers in a convenient format and communicate with customers directly in a project.
Filling Data
There are three ways of adding data to the project:
- Import data from file - data will be automatically imported to the project;
- Import custom data - manual data import (adding of several objects simultaneously);
- Create IP or host manually - creating an IP address or Hostname manually (adding of one object).
Import data from file
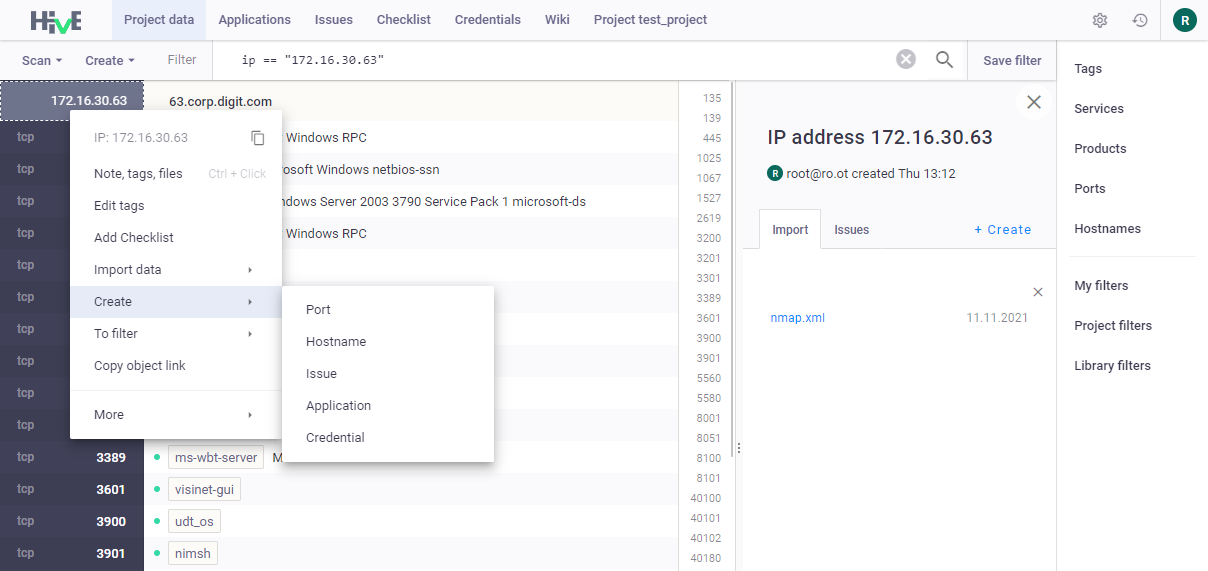
In the top-left corner, click Scan > Import > From tools or click Import data from file in a quick menu in the middle of the Project data tab;
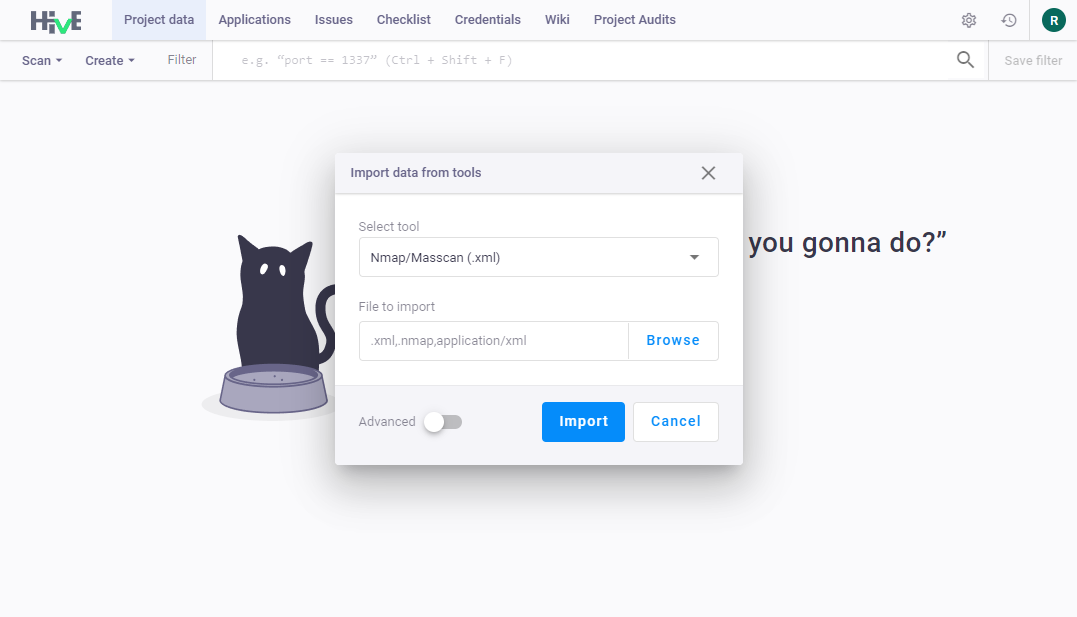
Select tool, results of which you want to import:
- Nmap (.xml)
- Masscan (.xml)
- Nessus (.xml)
- Metasploit (.xml)
- Cobalt Strike (.xml)
- Nuclei (.json)
- Amass (.json)
- Burp (.xml)
- OpenVAS (.xml)
- ZAP (.json)
- MP8 (.xml)
- Acunetix (.xml)
Click Browse and select needed file;
Note: parsing of large files may take some time. It depends on the file size.
Click Advanced to specify additional import parameters:
- save project data snapshot - after import, project data will be saved to a snapshot (available for all applications). Use snapshots to Compare project data and monitor the changes.
- Nmap/Masscan import options:
- only open ports - closed ports will not be imported;
- skip empty hosts - hosts without ports will not be imported.
- Nessus/Burp/OpenVAS/ZAP/MP8/Acunetix import options:
- create issues - issues of the selected tool will be imported to the project;
- set issue status - selected status will be set for all imported issues;
- create severity tags - during data import, platform will automatically create severity tags based on issue criticality (info, low, medium, high, and critical).
Note: in this case creation of issues in Hive may take some time. It depends on the amount of the issues.
- Nuclei import options:
- import nuclei tags - Nuclei tags will be imported to the project;
- create severity tags - during data import, platform will automatically create severity tags based on issue criticality (info, low, medium, high, and critical).
- Amass import options:
- import amass tags - Amass tags will be imported to the project.
- Click Import.
Now you can start working in the project.
Import custom data
- In the top-left corner, click Scan > Import > Parse data;
In Add custom data manually fill the column Parse data or click Import file. For example:
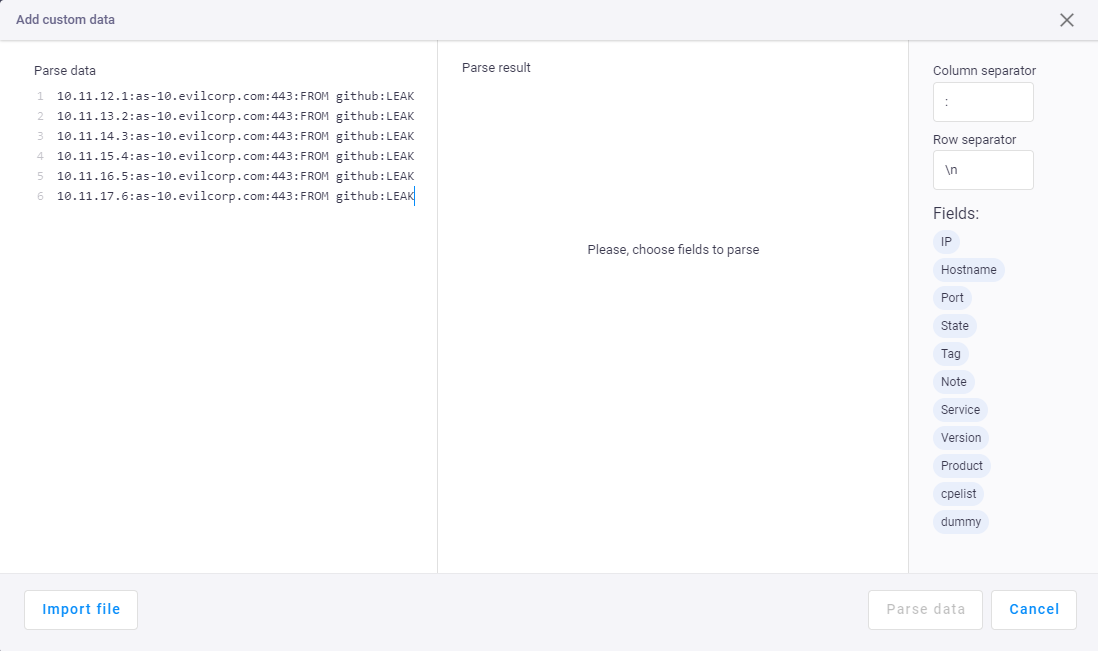
Note: using the option Import file, you can upload files in any format.
In Parse result column, specify fields that should be parsed. To do it, indicate column separators (e.g.
: ; ,), row separators (e.g.\n), and add tags;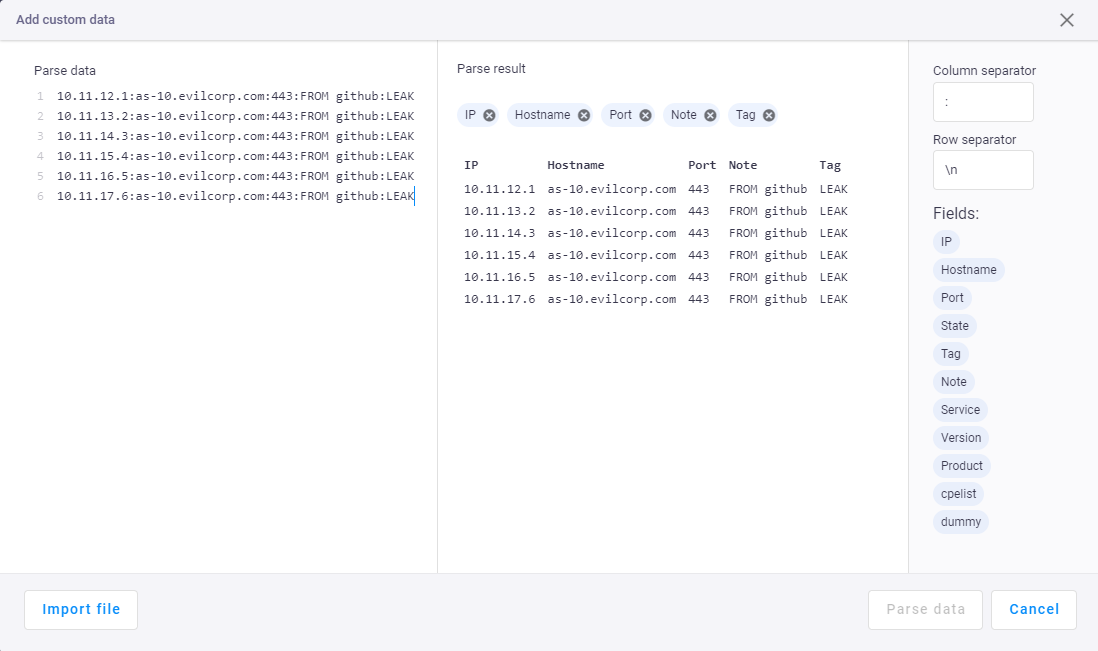
Note: use dummy tag to skip unnecessary fields during parsing of results.
Click Parse data. All data appears in the project:
Now you can start working on the project.
You can also Import custom data in a quick menu in the middle of the Project data tab.
Create IP or host manually
- In the top-left corner, click Create;
Select either New IP or Hostname without IP;
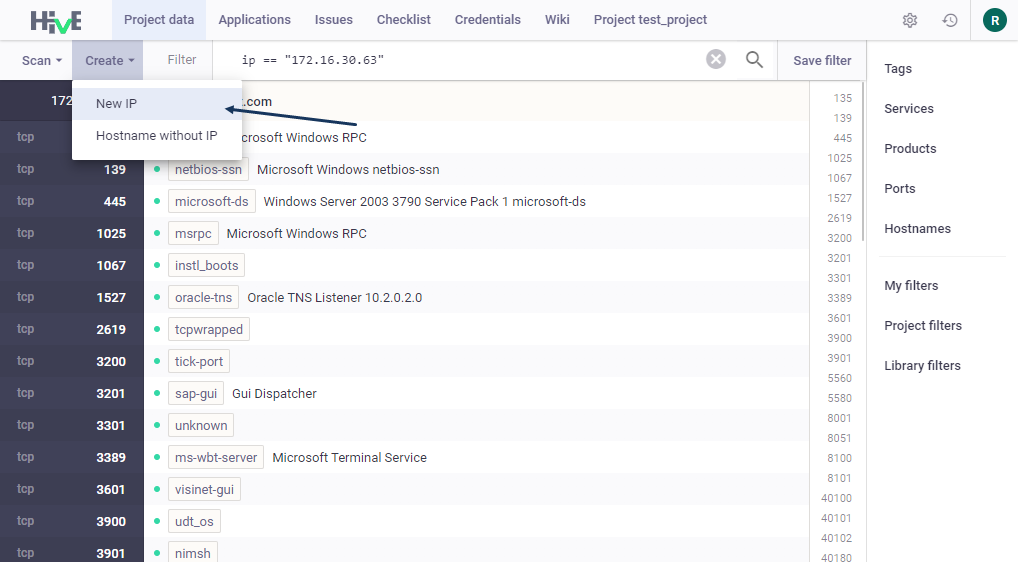
In appeared window fill IP address or Hostname;

New item appears in the Project data tab.
Now you can start working on the project.
You can also Create IP or host manually immediately after project creation in a quick menu in the middle of the Project data tab.
Export Project data
To export Project data:
- In Project data tab click Export in the top left corner;
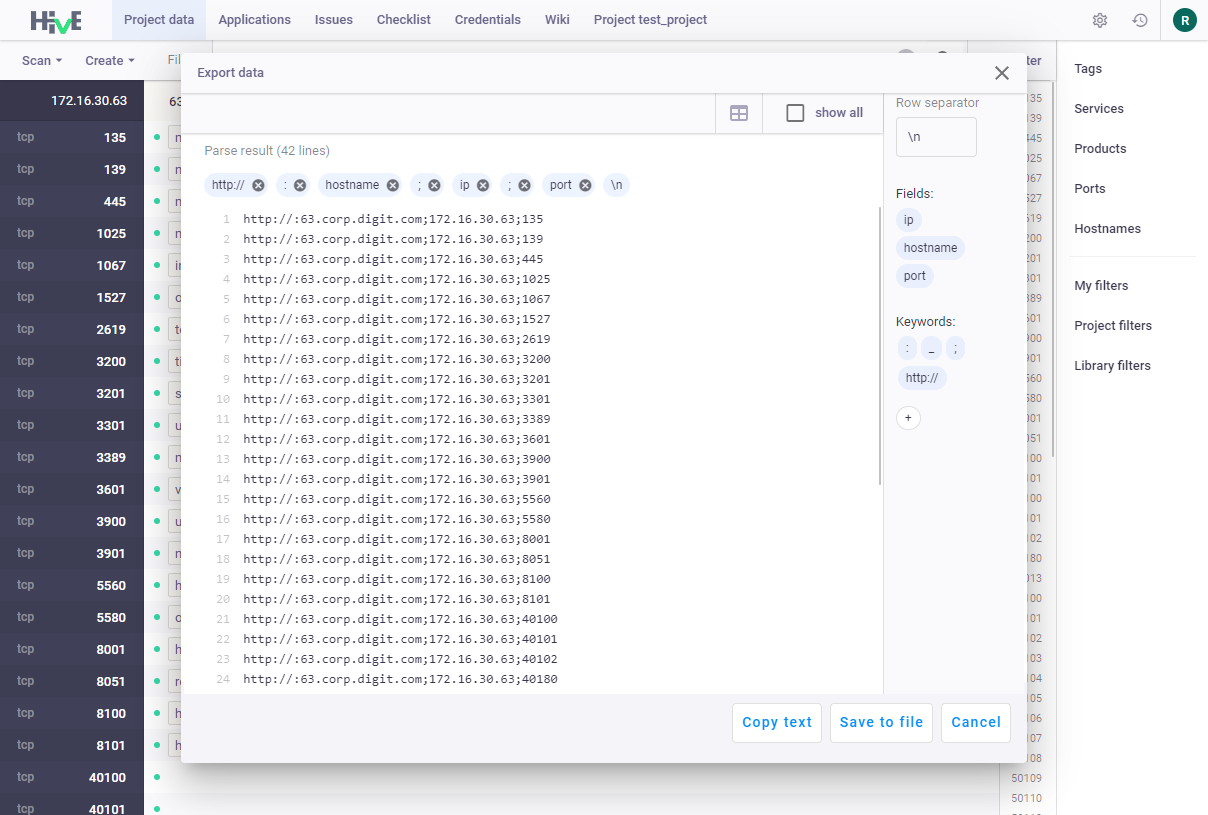
- Indicate row separator (e.g.
\n); Add needed Field and Keyword tags to the Parse result field;
Note: to add keywords click
+in the Keyword column.Click Save to file or Copy text to export data:
- Save to file option saves data to a file in a
.TXTformat; - Copy text option copies data to a clipboard.
You can select convenient view for displaying data in Export data window:
- List - the data will be displayed in a list;
- Table - the data will be displayed in a table;
- Show all - display of all data.
Work with project data
There are several ways to manage project data:
Method 1
- In Project data click on the Objects (
IP,Hostname, orPort) with the right mouse button; - In the menu, select one of the options:
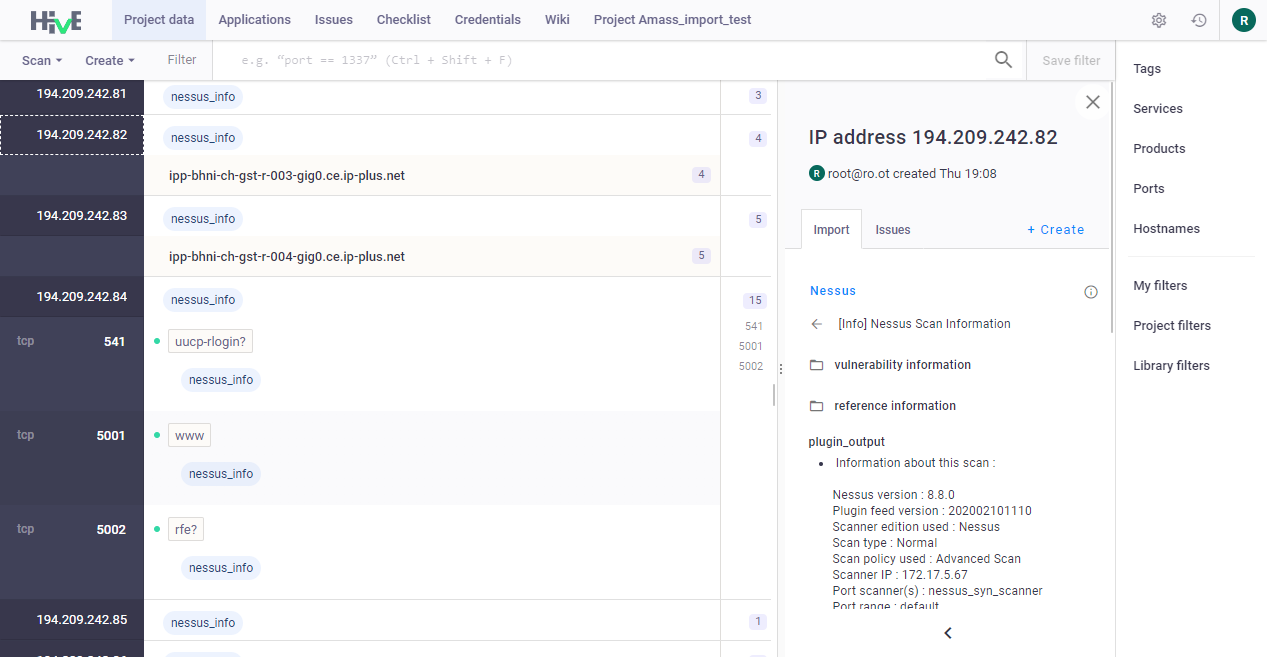
Method 2
- In Project data single click on the Objects (
IP,Hostname, orPort); - In the right menu, click + Create;
- Switch between tabs to see information about imported data and registered issues.
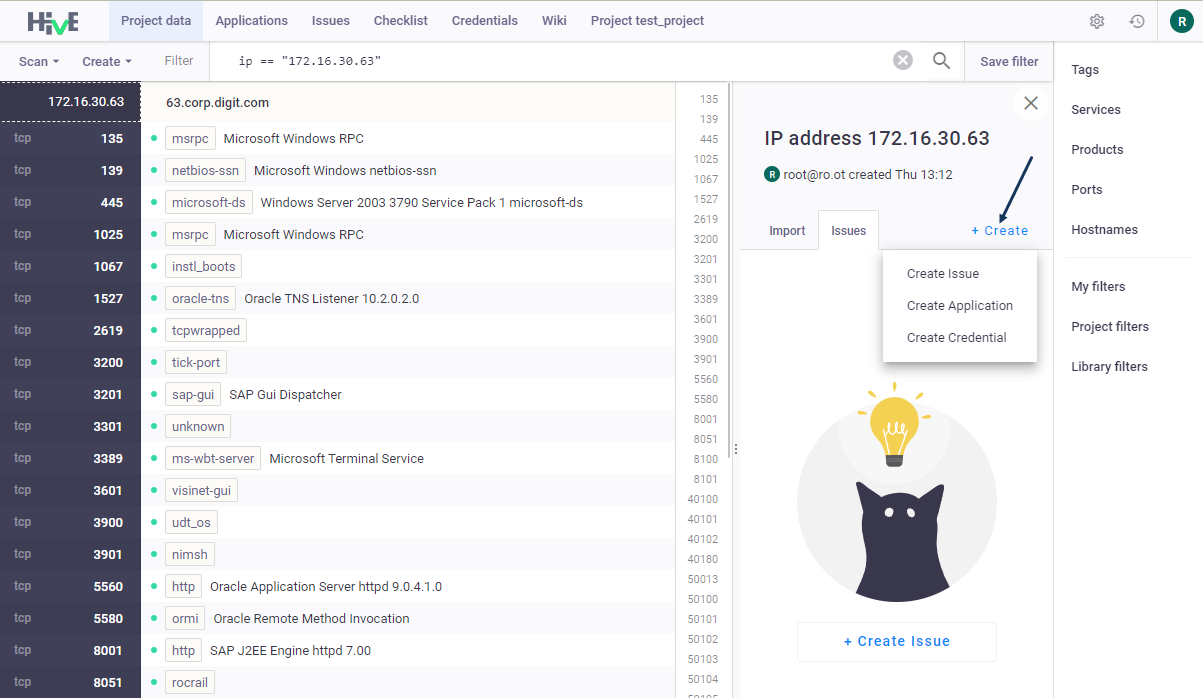
Note: use keyboard shortcuts to create filters, notes, tags, and add files with a click of a mouse.
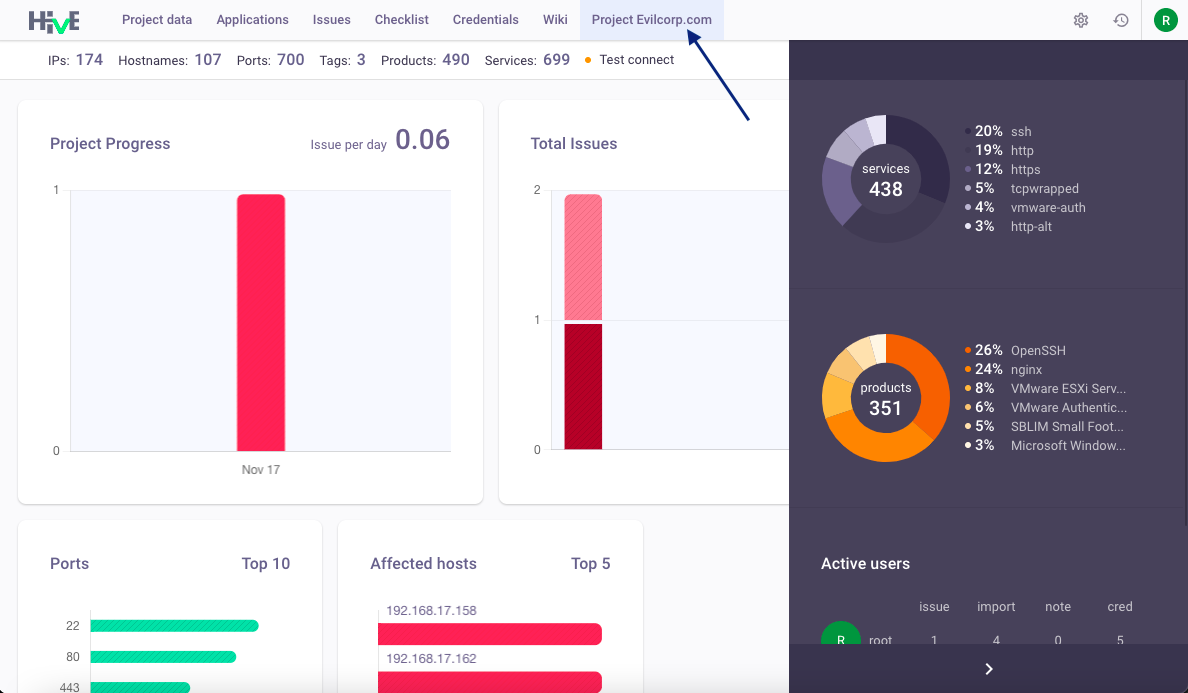
Project Summary
Project Summary contains statistics about Project progress, Issues, Affected assets, Ports, Services, and Users. All information is displayed on various charts and diagrams.
To see the project Summary, click on the project name:
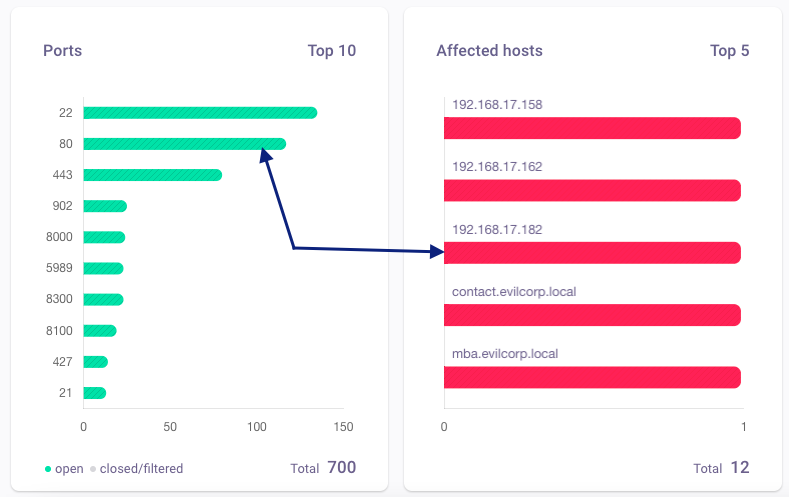
To see more detailed information about Affected assets and Ports, click on charts:
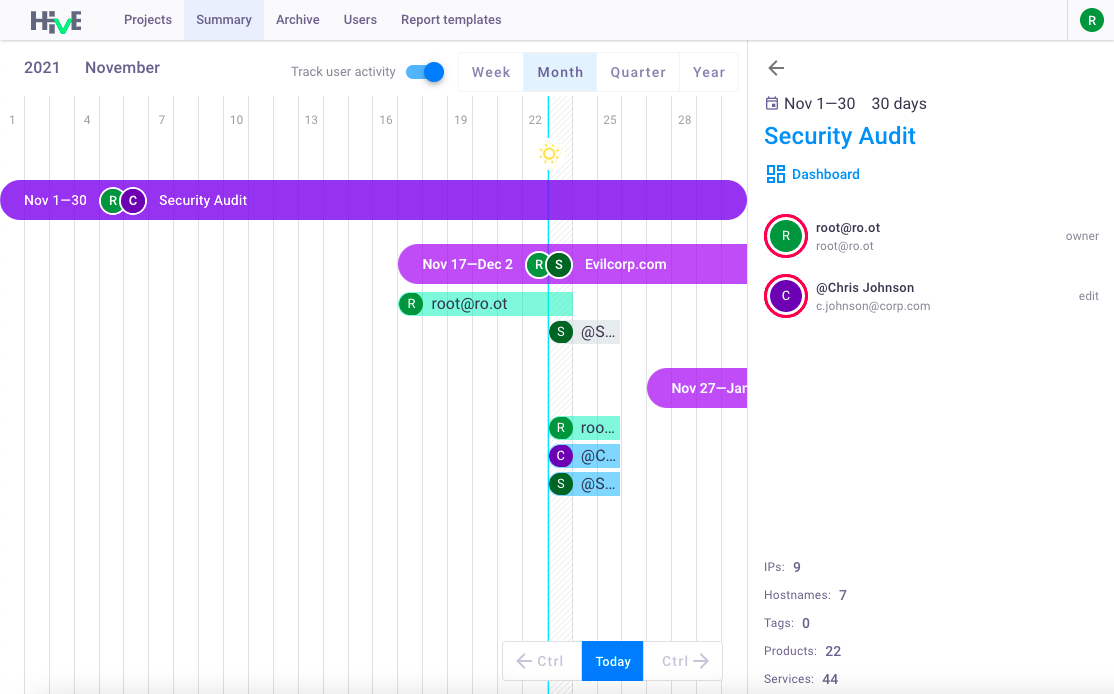
Global Summary
To view overall statistics by all projects, go to the Summary tab:
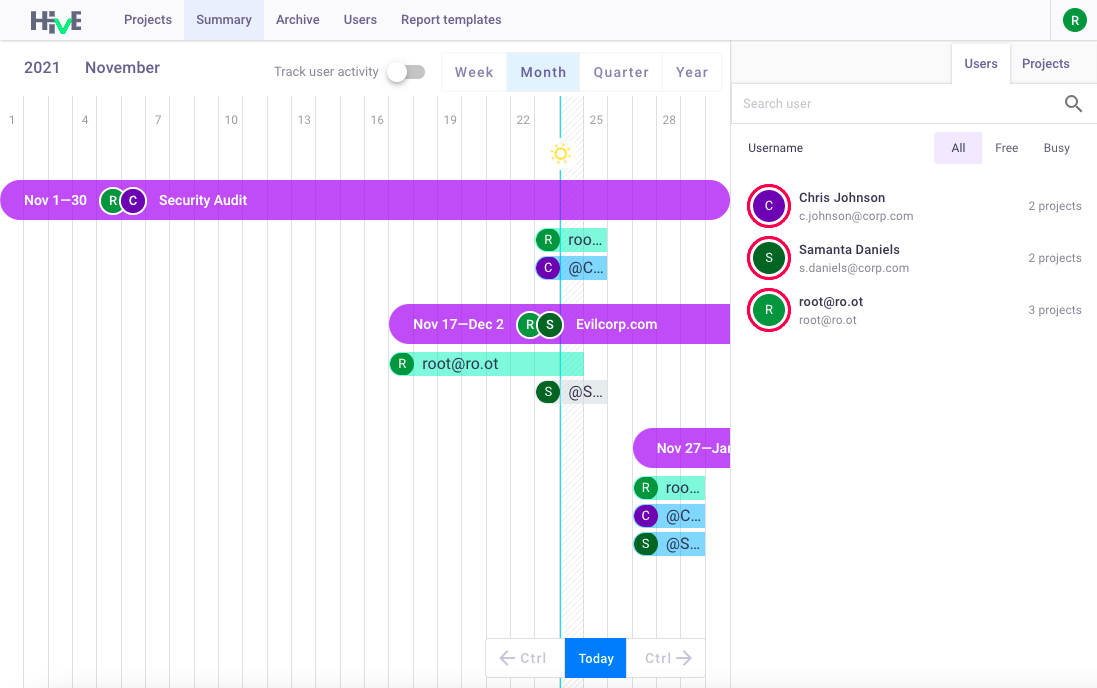
On this tab, you can view:
- All projects by Week, Month, Quarter and Year (Current, Scheduled, and Finished projects);
- All users (Free and Busy on projects).
Enable the option Track user activity to view the date of the latest user activity on the projects.
Click on the Project name, to get more information about the project.