Checklists
With the help of Checklists, you can plan and estimate the scope of work, as well as to check if you covered all tests to the deadlines. You can use checklists as a database by adding descriptions, files and issues directly to the checklists.
Creating checklists in the Project data
To add new checklist to the project data:
- Open your project and add data to it;
- Right mouse click on the Object (
IP,Hostname, orPort); In the drop-down menu select the option Add Checklist:
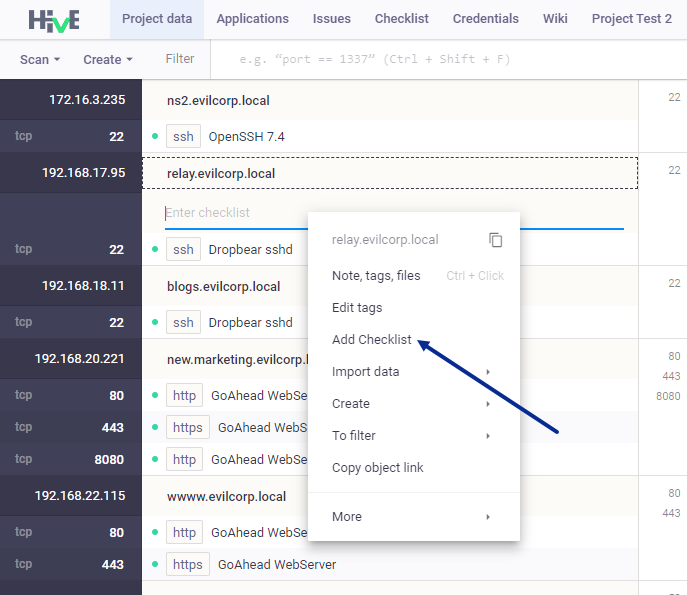
Enter checklist Name and press Enter;
- To add child items, right mouse click on the new checklist item and in the drop-down menu select Add item child;
- Type item name and press Enter;
- Repeat these steps to add several checklist items. New checklist appears next to the object and in the Checklist tab.
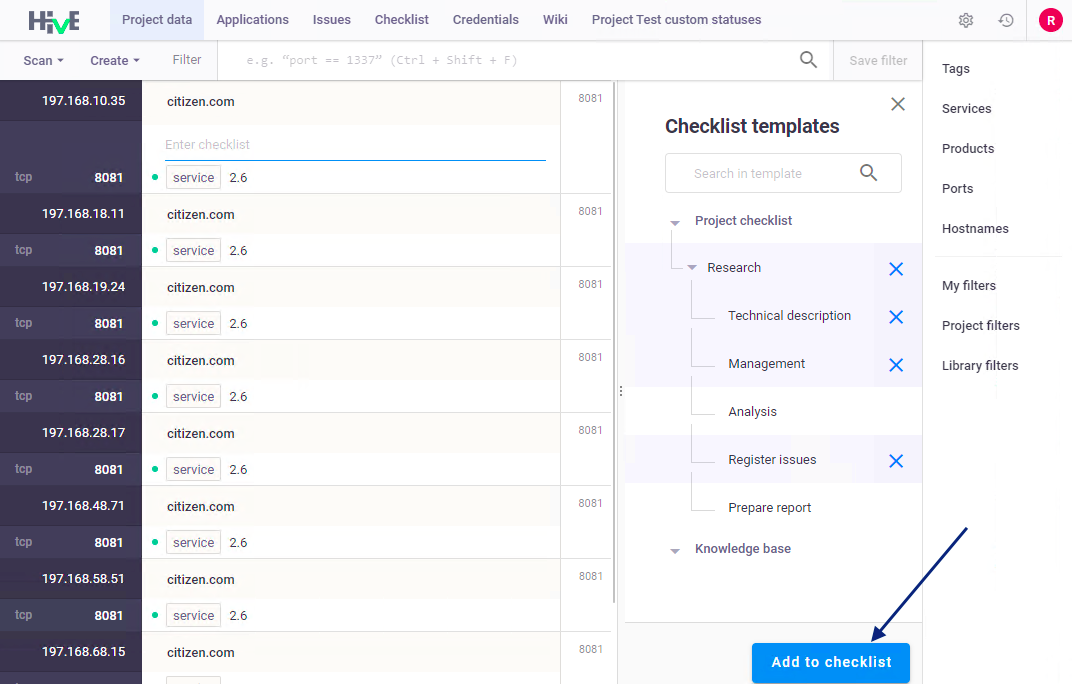
In the Project data tab, you can also add ready checklists from the Checklist templates menu:
- Project checklist - contains checklists that are already linked to other project Objects;
Knowledge base - contains a set of checklist templates that are stored in the platform knowledge base.
Note: to add templates from Checklist templates menu, you should first create them in Checklist and Knowledge base tabs.
To open Checklist templates menu and add ready checklist template:
- Right mouse click on the Object (
IP,Hostname, orPort); - In the drop-down menu select the option Add Checklist:
- In the Checklist templates menu select needed checklist and click on
+next to it; Click Add to checklist:
New checklist appears next to the object and in the Checklist tab.
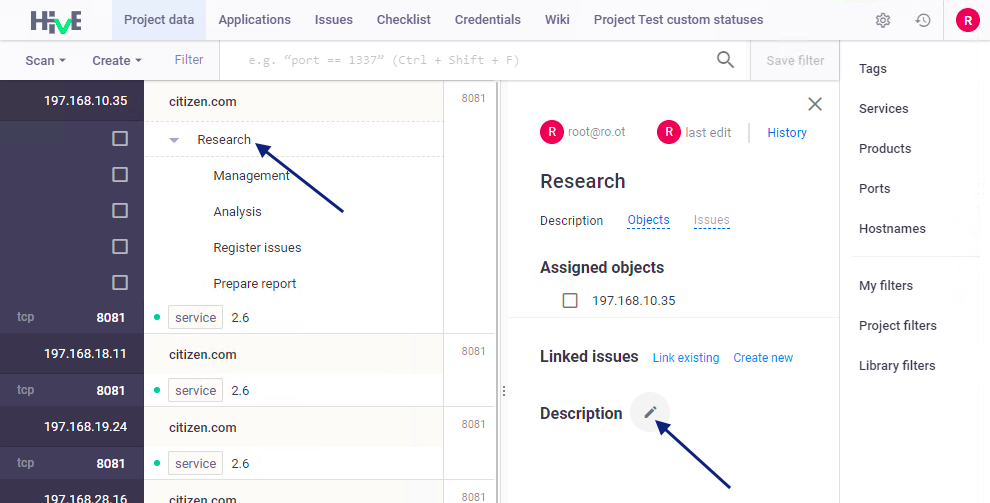
Click on a new checklist item to add Description, Assigned objects, or Issues.
To edit or delete checklist, right mouse click on the checklist item and in the drop-down menu select needed options.
Use Go to checklist option to view and edit your checklists in the Checklist tab.
Creating checklists in the Checklist tab
- Open your project and go to the Checklist tab;
- Click Add item;
- Enter checklist Name and press Enter;
Right mouse click on new item and in the drop-down menu select Add item (After, Before, Child, or Parent).
Notes: while creating checklists, use the following hot keys:
- Enter to add new checklist items (After and Before).
- Tab or Shift+Tab to add child and parent items.
Additional options:
- Turn on sync - enable this option and checklists will be synchronized with Apiary. This button is available only if there is a connection between two projects.
- Mark as inapplicable - enable this option to exclude this checklist from your audits.
Creating checklist templates in the Knowledge base
Checklist templates that are stored in the Knowledge base are available for all Platform projects.
To create a checklist template:
- Open your project and go to Checklist > Knowledge base tab;
- Enter the checklist Name;
- Enter checklist Name and press Enter;
Right mouse click on new item and in the drop-down menu select Add item (After, Before, Child, or Parent).
Notes: while creating checklists, use the following hot keys:
Enterto add new checklist items (After and Before).TaborShift+Tabto add child and parent items.
Click
Save. New template will be added to the Knowledge Base and will be available for all Platform projects.
Add description, files and issues to the checklists
To add description:
Click on checklist item:
In the checklist menu on the right, click on
 next to Description:
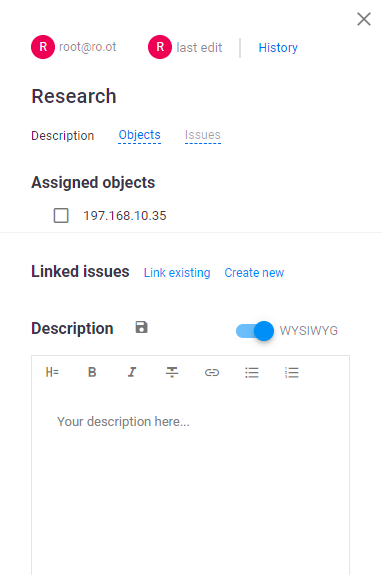
Add description, pictures and click on
 to save changes. After saving, an icon
  appears next to the checklist item;
- To add a vulnerability to the checklist, click
Linked Issuesand select one of the options:
Link existing- select issue in the list, and add it to the checklist using checkbox;Create new- register a new vulnerability, and add it to the checklist using checkbox (see section Register issues;
- To switch between Description, Objects, Issues, click on the active links under the checklist name
- Click
Historyto view the history of changes in the checklist.
Export and import checklist and checklist templates
You can import and export checklists in two formats:
- in text format
.txt; - in Markdown
.mdformat.
To export checklist template in project and platform knowledge base:
- Go to the tabs Checklist and Knowledge base;
- In the Checklist tab click
Checklist>Export; - In the Knowledge base tab click
Template>Export; - In the
Export templateswindow select one or several checklist templates; - In the
Filenamefield enter name of the file (optional) and select needed format.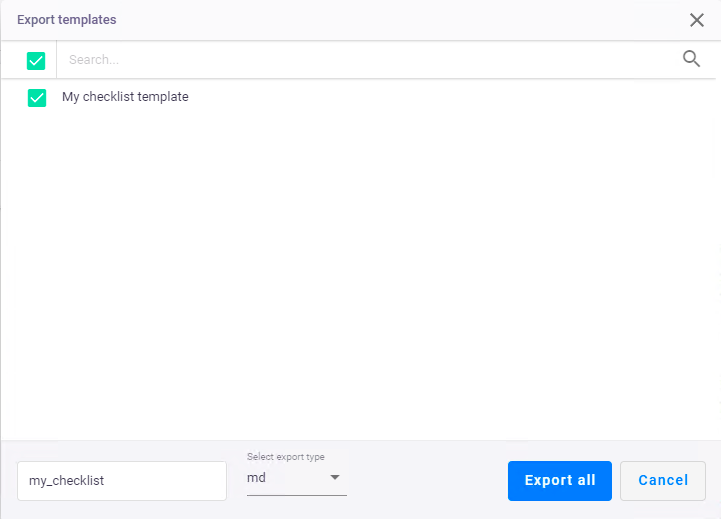
Note: if the filename is not indicated, all exported checklists will be entitled as
template_export.
To import a checklist into a project or platform knowledge base:
- Go to the Checklist or Knowledge base tabs;
- To import a checklist from a text file
.TXT:
- In the Checklist tab click
Checklist>Import from file; - In the Knowledge base tab click
Template>Import from file; - In the Import template window, click
Browseto upload a file or clickImport text as fileto enter text manually; - Click
Import.
- To import a checklist from Markdown
.MD:
- In the Checklist page, select the menu
Checklist>Import from MD; - In the Knowledge base page select the menu
Template>Import from MD; - In the Add MD Checklist window, click
Import from fileor manually enter the checklist in Markdown; - In the
Checklist starts withfield, specify the characters with which the checklist begins (for example,- [ ]); - In the
Number of spacesfield, specify the number of spaces to preserve the nesting of the imported checklist (child items); - Click
Save data.
- The new template will appear in the project or in the knowledge base, depending on where you imported it.