Register Issues
Issues are security breaches found in the targeted systems during penetration testing and registered by pentesters as tickets in the Hive Platform.
To register Issue, perform one of the following steps:
In Project data:
- Single click on the Object (
IP,Host,Port) and in the appeared sidebar click Create Issue: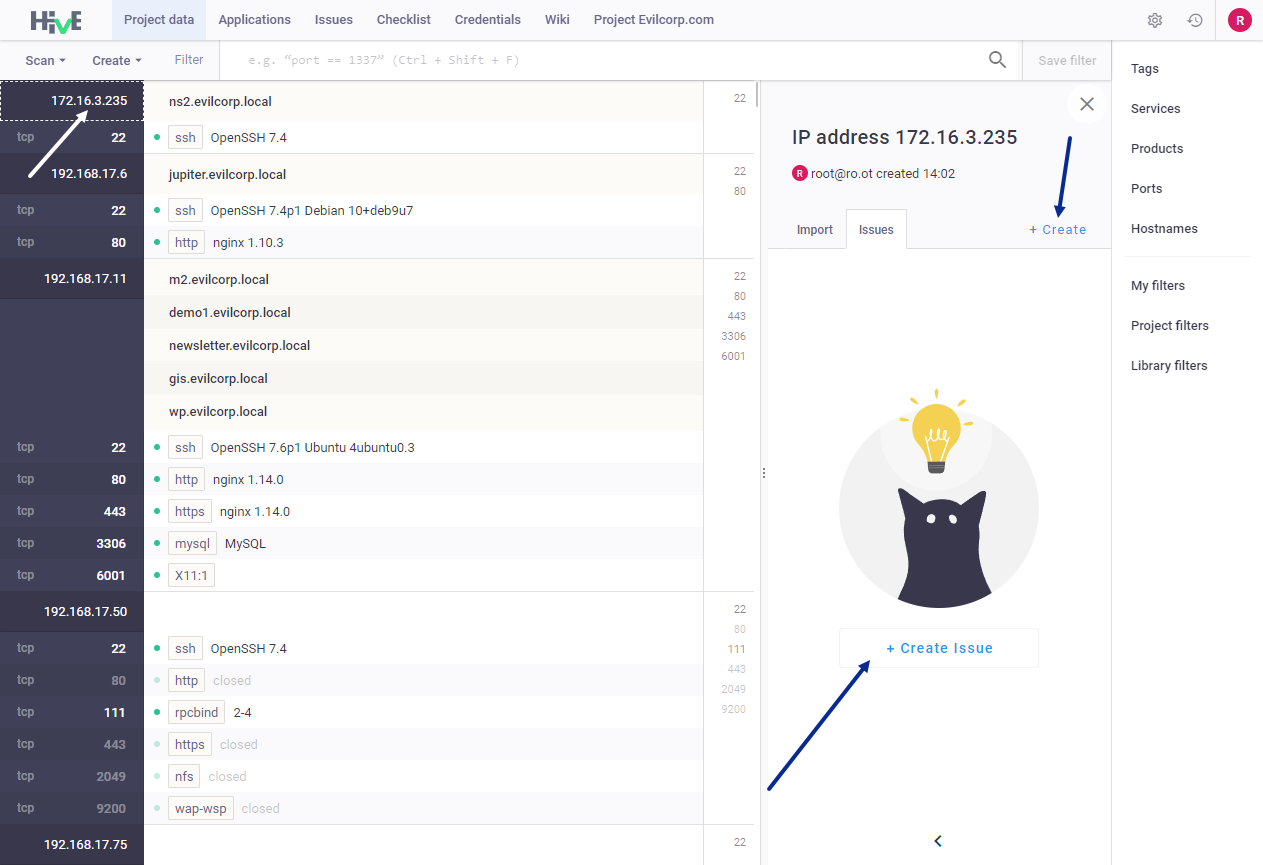
- Right mouse click on the Object (
IP,Host,Port) and in the drop-down menu select option Create > Issue: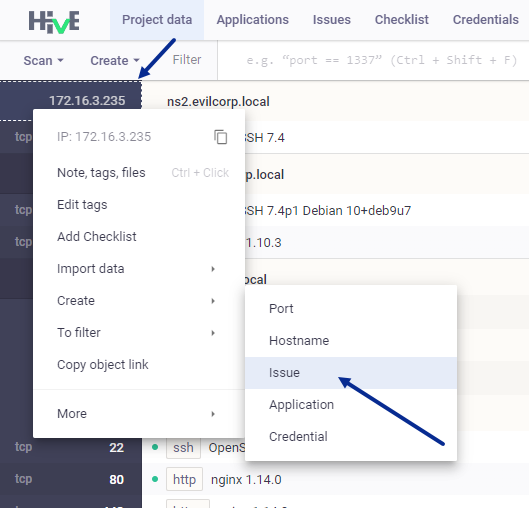
- Single click on the Object (
or
- In Issues tab click Create Issue;
- Select issue schema in the list or add a new one using the
+Schemabutton:
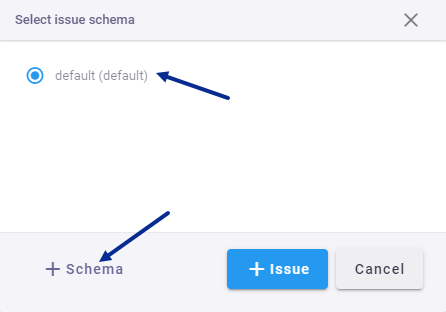
Note: when you select issue schema, you will not be able to change it later.
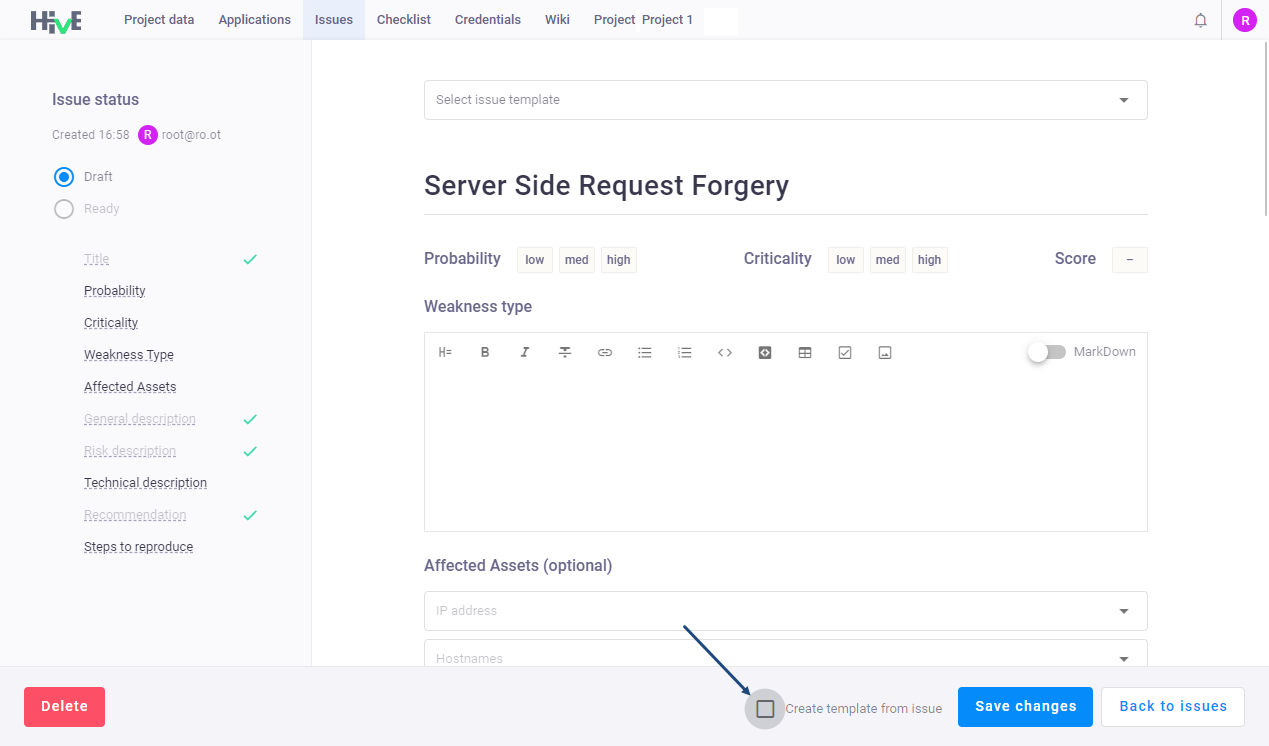
- Select issue template to fill some fields automatically, or fill in issue fields manually;
- Drag and drop files to attach them to issue. You can attach any files to the issues.
Note: you can upload Images in the following formats:
.jpg,.png,.jpeg,.gifand file size is up to 100 MB (contact system administrator to change this parameter);
- Change issue status if you finished issue creation (you can do it later);
Note: issues can be added to the report.
- Click Save Changes to register the Issue. A new issue appears in the Project data tab next to the corresponding Object (
IP,Host,Port) and in the Issues tab.
When registering an issue, you can save it as a template. To do it, in editor enable option Create template from issue:
Create reports and export issues
To create a report by Issues:
- In the Issues tab click Generate report;
- In the drop-down menu select report template and click Generate report.
Notes: the report will be downloaded in
.DOCXformat.
To export Issues to Apiary:
- Make sure that your project is connected to Apiary project;
- When connection between projects is established, mark issues as
Readyand they will be automatically sent to Apiary.
Issue templates
There are several predefined issue templates on the Platform, which you can use for registering issues. All issue templates are stored at the Platform Knowledge base. To view issue templates, go to Issues > Templates tab.
Note: you cannot delete predefined issue templates.
To create an issue template:
- Go to the Issues > Templates;
- Click Create template;
- Fill all fields and click Save changes.
New template appears in the Templates list.

To manage the issue template, right mouse click on the template and select one of the options:
- Edit — template editing;
- Info — template information;
- Delete — removal of template;
- Create Issue — registration of the Issue by the template.
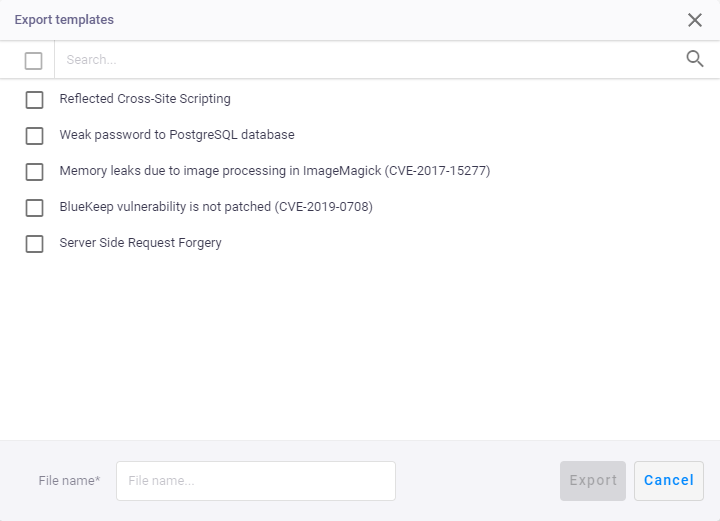
To export issue template:
- Go to the Issues > Templates;
- Click Export;
- In Export template window select a needed template;
Enter the file name and click Export. You will get archive with two files in .json format:
manifest.json— common information about template;data.json— issue template.
To import issue template:
- Create files
manifest.jsonanddata.jsonaccording to the following .json format; - Save both files into the archive;
- Go to the Issues > Templates;
- Click Import. A new issue template appears in the list.