Configure SLA
SLA (Service Level Agreement) is the deadline by which an issue should be remediated. SLA is applied automatically to all issues depending on the configurations, or set manually by the user.
Change issue SLA manually
You can edit issue SLA manually. To do it:
- Open the project;
- In the left menu select Projects > Issues tab;
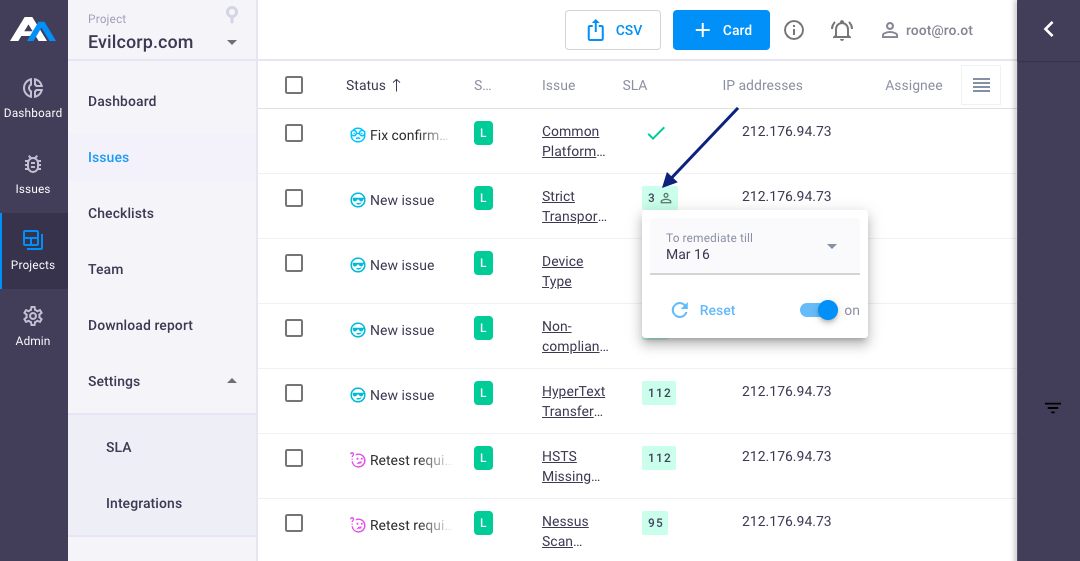
- Click on SLA icon in the issue and select needed date;
or
Single click on issue Title;
Click on SLA icon and select needed date:
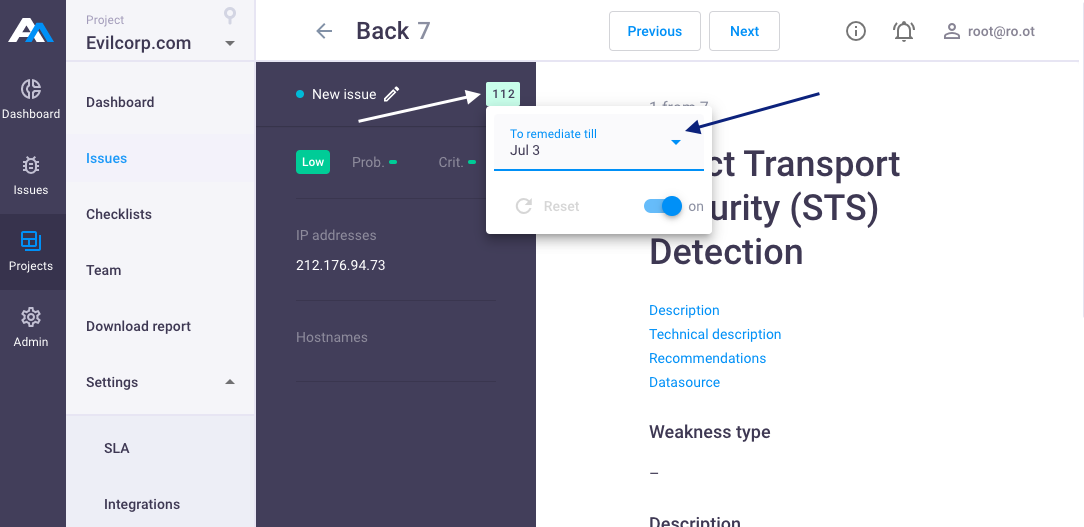
- Click on
 to return default settings;
 - Click on
 or
or  buttons to turn on\turn off SLA for the selected issue;
- Click on
New SLA value will be applied to the selected issue.
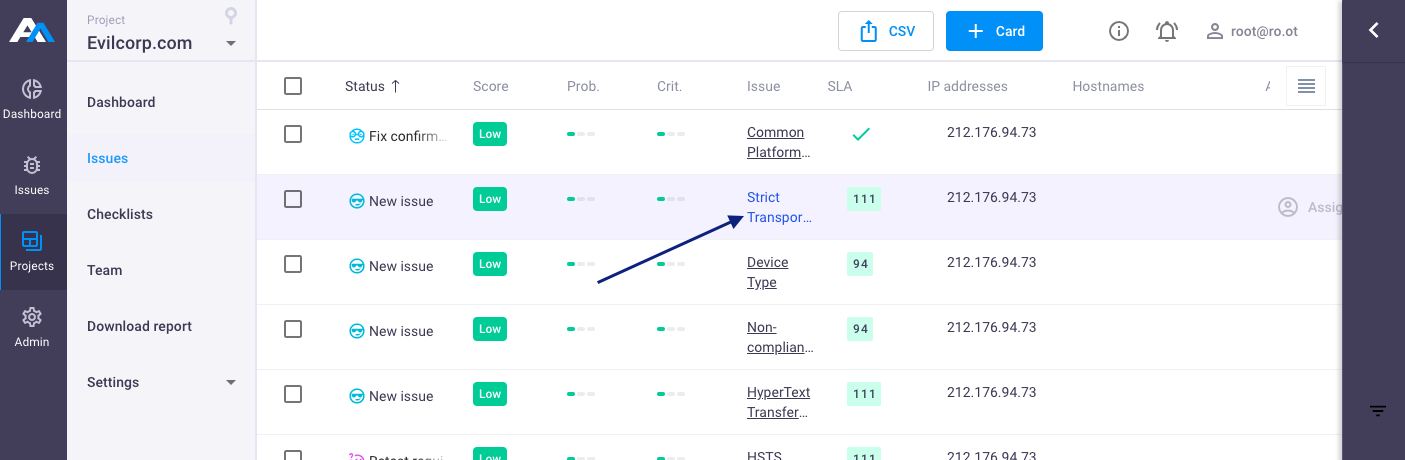
SLA has the following values:
 - issue should be remediated till the selected date;
 - issue is not remediated and overdue by date;
 - issue status Fix confirmed, issue has been remediated to the selected date;
 - issue status Fix confirmed, but issue was overdue by date;
 ,
,  - manually changed issue SLA;
 ,
,  ,
,  - issue SLA is turned off.
Project SLA settings
Only project owner and platform administrator can edit SLA settings in the project.
By default, project SLA settings are applied to all project issues, except issues with manually changed SLA and issues with the status Fix confirmed.
Note: SLA settings in project are of high priority. When you enable them, global SLA settings will not be applied to the project or will be applied only to an unchanged parameters.
To configure SLA settings in project:
- Open your project;
In the left menu select Projects > Settings > Project SLA:
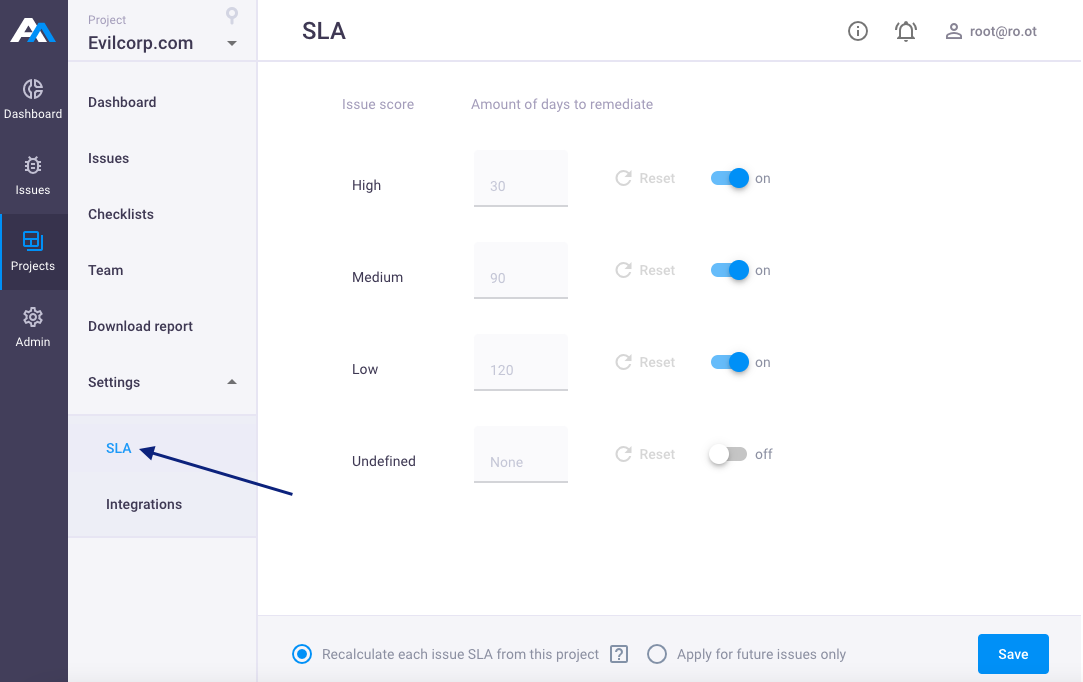
- Issue score - total score of the Issue (High, Medium, Low, Undefined (issues without score));
- Amount of days to remediate - deadline of issue remediation in days. Default settings:
High- 30 days, enabled by default;Medium- 90 days, enabled by default;Low- 120 days, enabled by default;Undefined- None, disabled by default;
- Recalculate each issue SLA from this project - SLA will be recalculated for all issues in your project. Exception: this option will not be applied to the issues with manually changed SLA and issues with Fix confirmed status.
- Apply for future issues only - current SLA settings will remain for existing issues and will be recalculated only for new issues in the project.
- Click on to return default settings;
- Click on or buttons to turn on\turn off SLA for selected issues score;
Specify your parameters and click Save. New SLA settings will be applied to the project issues.
Global SLA settings
Only platform administrator can edit global SLA settings in the platform.
By default, global SLA settings are applied for issues in all projects, except:
- Projects with custom SLA settings for issues;
- Issues with manually changed SLA settings;
- Issues with the status Fix confirmed.
To configure global SLA settings:
- Log in to Apiary platform as an administrator;
In the left menu select Admin > SLA:
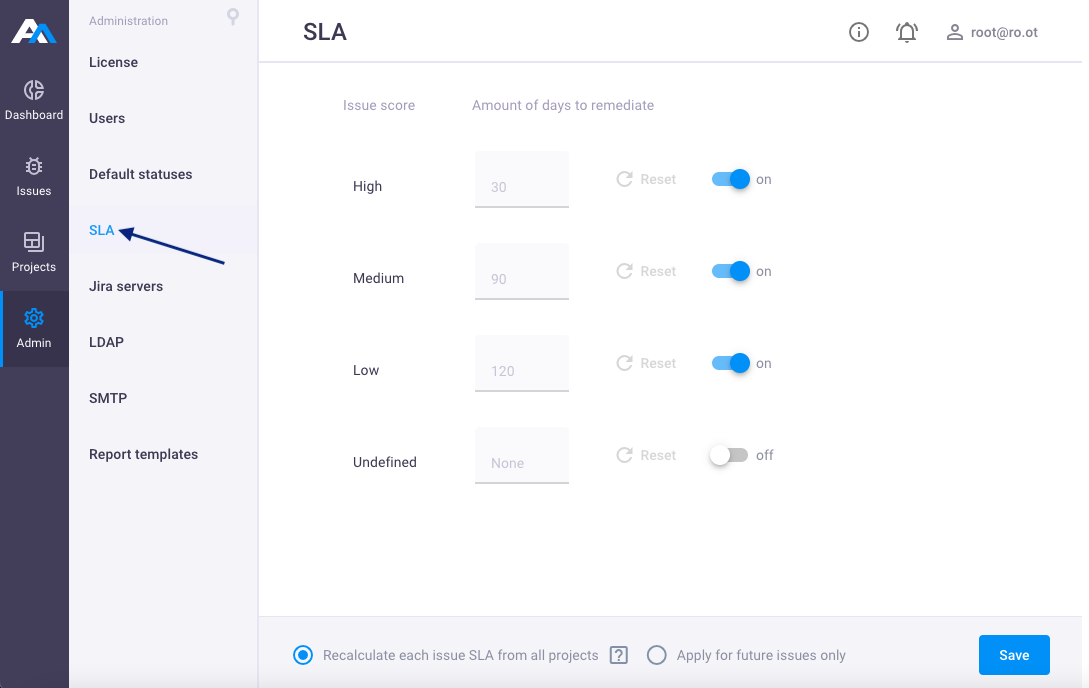
- Issue score - total score of the Issue (High, Medium, Low, Undefined (issues without score))
- Amount of days to remediate - deadline of issue remediation in days. Default settings:
High- 30 days, enabled by default;Medium- 90 days, enabled by default;Low- 120 days, enabled by default;Undefined- None, disabled by default;
- Recalculate each issue SLA from all projects - SLA will be recalculated for issues in all projects that use global SLA settings. Exception: this option will not be applied to the issues with changed SLA and issues with Fix confirmed status;
- Apply for future issues only - current SLA will remain for existing issues and will be recalculated only for new issues in all projects that use global SLA settings.
- Click on to return default settings;
- Click on or buttons to turn on\turn off SLA for selected issue score;
Specify your parameters and click Save. New SLA settings will be applied in all projects that use global SLA settings.