Issue statuses
An issue status displays issue progress in the project.
If projects are connected, issue statuses will be automatically synchronized with Hive project.
Default issue statuses
Default Issue statuses are available for all Apiary projects:
 New issue — a new issue that is sent from Hive;
 Retest required — an issue was fixed. Additional tests are required to check if a vulnerability was closed. This status is sent to Hive;
 Fix confirmed — an issue was fixed. Issue with this status is automatically sent from Hive;
 Fix not confirmed — an issue was not fixed. Issue with this status is automatically sent from Hive;
 outgoing issue status — issue status with this icon is automatically sent to Hive;
 incoming issue status — issue status with this icon is automatically sent from Hive.
Note: issue statuses are unidirectional. For example, if you change incoming status on Apiary, issue status will not change on Hive.
Custom issue statuses
Project owner and platform administrator can also create custom issue statuses.
Custom issue statuses in Apiary can be synchronized with Jira (see section Integration).
Note: custom issue statuses are not synchronized between Hive and Apiary.
There are two types of custom statuses:
- Project issue status — available only to the selected project and is not applied to the other Platform projects.
- Global issue status — available for all new projects in the platform and is not applied to the old projects.
Create project issue statuses
This option is available for project owner and platform administrator.
To create custom issue status for the project:
- Log in to the platform as a project owner or platform administrator;
- Open your project and In the left menu select Projects > Issues;
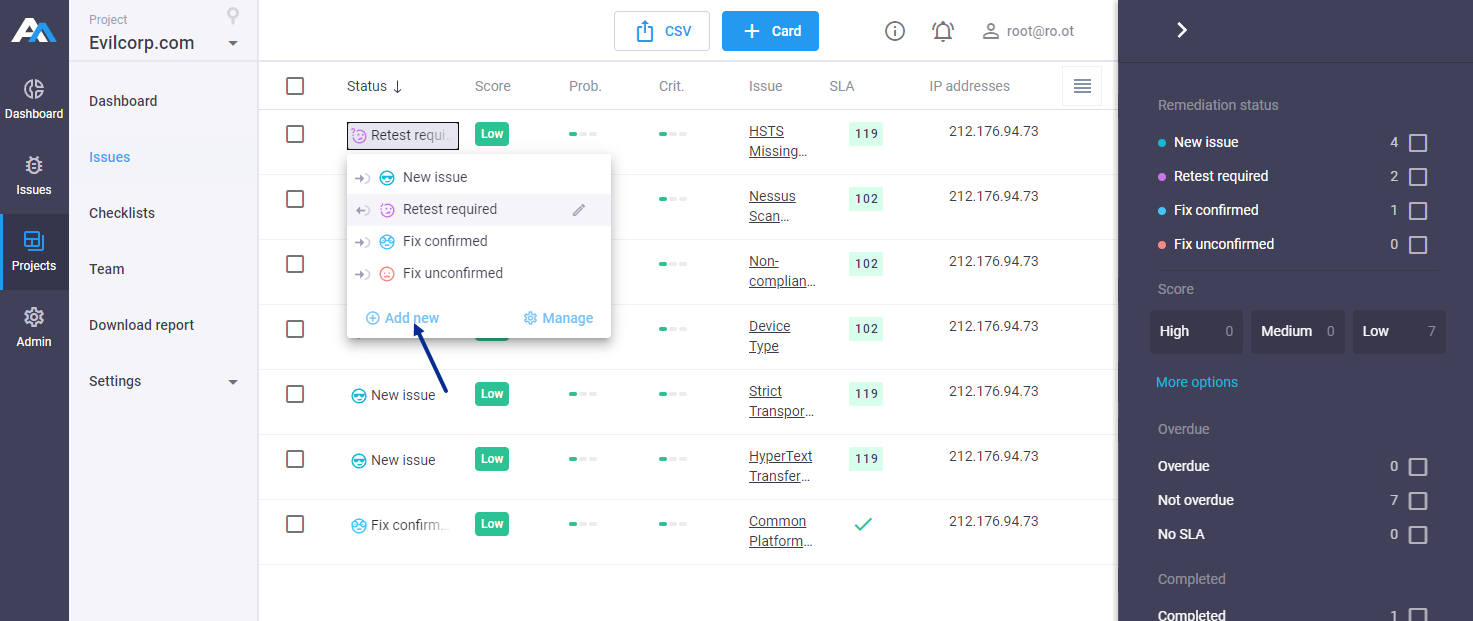
- In the list of issues, select issue;
- Click on status icon and select needed issue status;
To add new status, click on +Add new button:
Select icon, icon color, and enter name of the status;
Click
Addto save changes: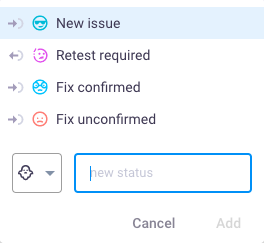
or
- Click on
Managebutton; Select icon, icon color, and enter name of the status;
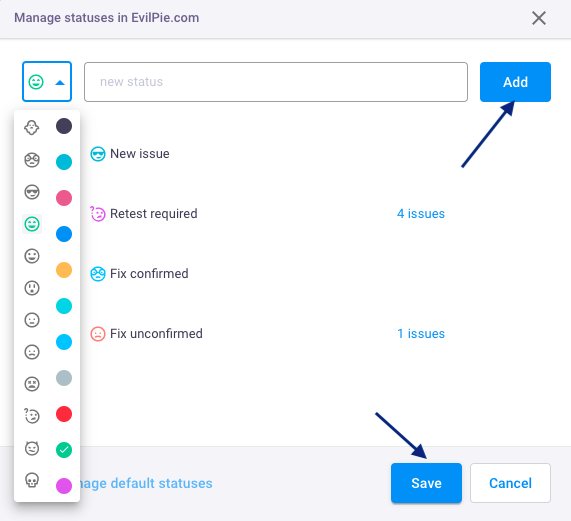
Click
Addand new status appears in the list;- To edit status name click on
 ;
; - Click
Saveto apply changes; - Now you can assign your status to the issues.
Manage global issue statuses
Only platform administrator can add and edit global issue statuses in the platform.
To create global issue statuses:
- Log in to the platform as an administrator;
- In the left menu select Admin > Default statuses;
Select icon, color, and enter name of the status;
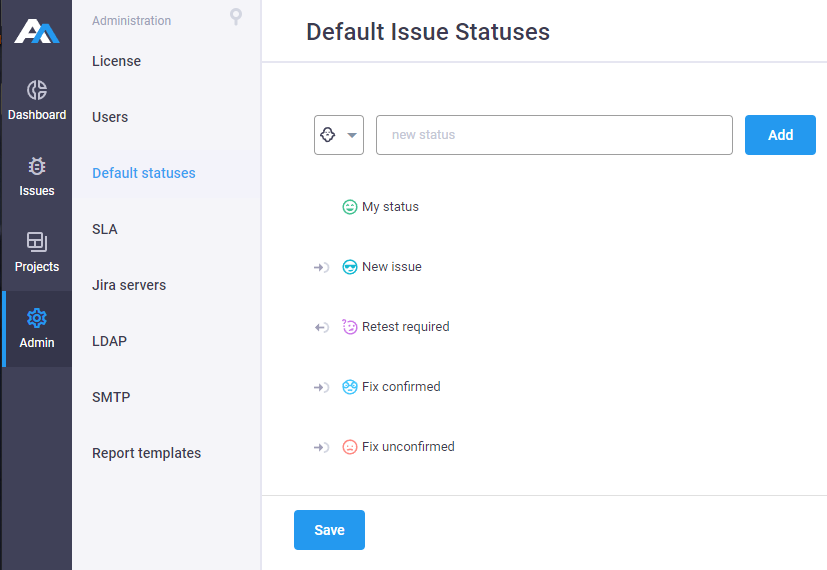
Click Add and new status appears in the list;
- To edit status name click on ;
- Click Save to apply changes;
- New status will appear in new projects.